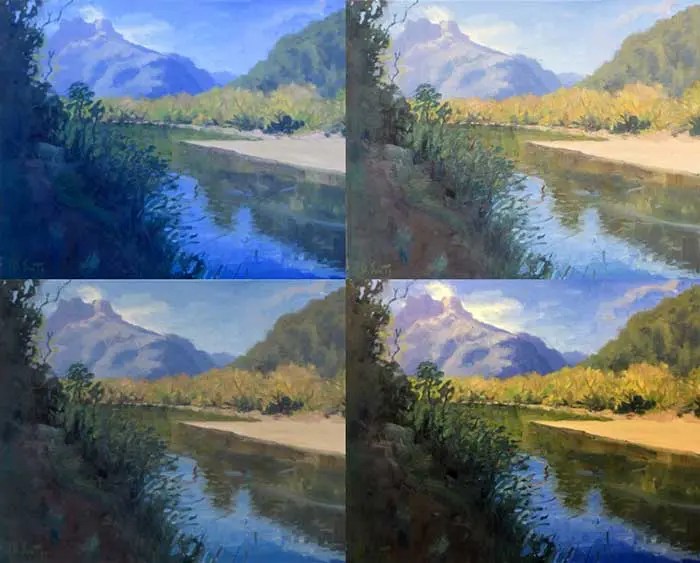
Taking beautiful photographs of your art sometimes feels harder than actually creating it. If you do not know what you are doing, then your photos will frequently turn out too bright, dull, warm, cool or glary (like the photos below of a recent painting).
In this post, I walk you through my process for taking photos of my art in an effort to save you some frustration.
Note: I am a painter, not a photographer. So you might have a better way of doing things. If so, feel free to add to the comments at the end.
Quick (and Easy) Tips for Photographing Your Artwork
For our next Artist Tip (alternately, this series could be titled So You’ve Made A Painting. Now What?), let’s take a quick dive into the world of photography. Part and parcel of selling artwork online is capturing it at its best. You want to make your work shine but aren’t necessarily an expert on lighting and editing. We get it.
Capturing your artwork doesn’t have to be complicated, and you don’t need expensive software or heaps of gear to aid you. We’ll go through the fundamental elements of taking a flattering photograph of your work, plus a few specifics that we require for photo uploads on Saatchi Art. For the tl;dr crowd, skip to the bottom for our a helpful video that sums it up.
Lighting
Perhaps the trickiest part is making sure the lighting is right. The color of the room, temperatures, and use of flash can all distort the color balance, resulting in blues, yellows and greys that really should more closely resemble white.
Natural light is your friend. A cloudy or overcast day, particularly, can produce great results, as clouds work as a giant softbox.
Perhaps the trickiest part is making sure the lighting is right. The color of the room, temperatures, and use of flash can all distort the color balance, resulting in blues, yellows and greys that really should more closely resemble white.
Equipment Needed
Below is a list of some of the ideal equipment. You do not need all of these things and you can certainly make do without, but they help
Tripod
The best camera you have
Easel (or something to hold your artwork)
A computer (for post-processing)
Photoshop (for post-processing) or some alternative software
What Camera Do You Need?
You do not need a top-of-the-range camera to take a great photo of your art. It helps, but you can do a lot with some of the lower-range models.
If possible, use a DSLR or mirrorless camera, as you will get higher quality photos and they allow you to manually adjust the settings. But if that is not an option, then a phone camera or point-and-shoot camera will be fine.
Setting up the Shot
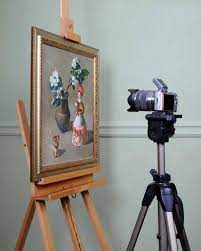
Step 1: Place your painting under appropriate light on an easel (or some other stand). Make sure there is no glare on the painting. I prefer to take photos outside on an overcast day, as this solves the glare issue.
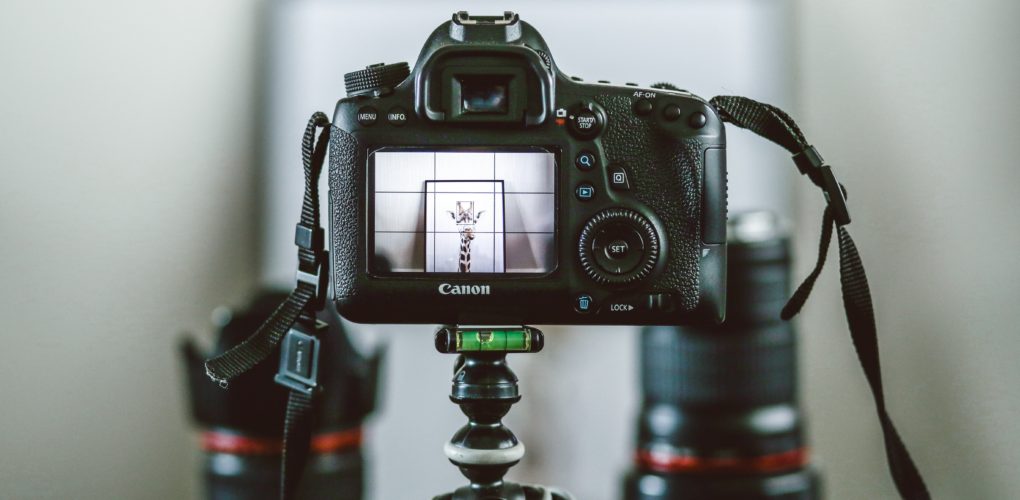
Step 2: Set up your camera on a tripod and align it so that it is perpendicular with the painting. If possible, make sure there is no light coming from behind the camera. Ideally, place the camera in a shaded area (like I have done in the photo below).
Step 3: Make sure the painting is being hit with enough light evenly over the painting. If not, then change the lighting if you can or the position of the painting.
Step 4: Adjust the camera settings (discussed below).
Camera Settings
If you want to get the most out of your camera, you should manually adjust some of the settings.
Set a 2-second timer on the camera so that there is no movement when the shot is taken.
Set the ISO on your camera to 100 (or as low as possible).
Set the camera to Aperture Priority. This will automatically set the shutter speed for you (one less thing to worry about).
Set the F stop to between F5 to F8.
Ensure all of the painting is in focus.
Ensure all of the painting is in the frame and the edges of the painting neatly align with the edges of the photo.
Note: If you are taking photos using your phone camera then you will probably not need to worry about adjusting the settings. Phone cameras are very good at adjusting everything automatically.
Taking the Photo
You should now be ready to take some photos. Don’t just take one photo. Take multiple photos using slightly different settings on the camera. I usually fiddle with the focus, exposure and distance between the camera and the artwork.
Then I will go through all the photos on my computer to see which turned out the best. Sometimes you just don’t really know which settings will produce the best photo as there are so many variables involved.
Also, make sure you shoot Raw if possible rather than Jpeg as this will allow you to make better adjustments on your computer using editing software. If Raw is not an option, then just shoot at the highest quality Jpeg setting.
Post-Processing
I like to keep any post-processing to a minimum as I think it is more important to just take a great photo in the first place. You cannot edit a bad photo into a great photo.
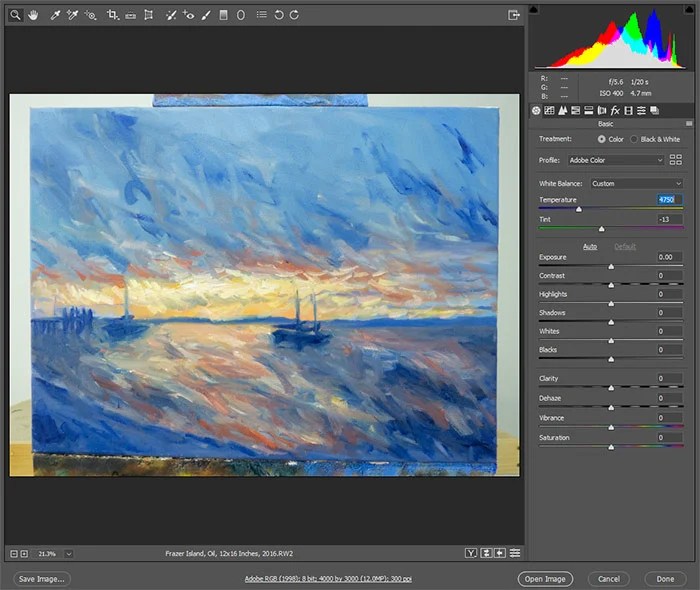
If you shot the photo in a Raw format, then you will have more editing options. Below are screenshots from my Photoshop account which give you an idea what all the things you can edit with a Raw file.
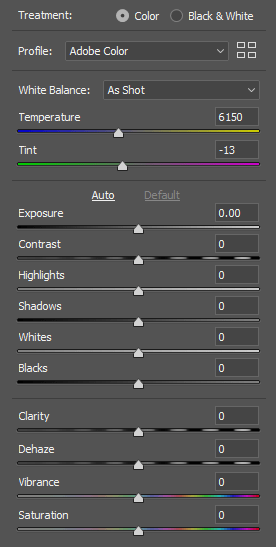
As you can see, I can adjust the color temperature, brightness, saturation and many other important aspects of the photo. This helps me match the photo to what the artwork looks like in real life.
Most of the time, I just change the color temperature slightly. This allows me to make the photo warmer if it was shot under a cool light, or cooler if it was shot under a warm light.
Here are some of the other tasks I do during post-processing:
- Crop all the background from the photo. This part should be easy if you lined up the shot correctly, but if you shot at a bad angle then you may have trouble lining everything up. Most editing programs will have some tool to straighten your image, but this is not reliable.
- Make sure all the parts of the artwork are in focus. You can check this by zooming in on different parts of the artwork.
- Place the painting next to my computer so I can compare the general likeness. Remember, you want your photo to be an accurate representation of your painting – not better, not worse.
- Save the Raw file and a Jpeg file of the highest quality on my computer. Then, I will change the size of the photo and save it for the web (this is a smaller image which loads faster on a website).
Other Tips for Photographing Your Art
Here are some other tips for taking beautiful photos of your art:
- Try not to get frustrated and think logically. If the photo did not work, narrow down on what went wrong, fix it, and try again.
- Remember that taking a great photo of your art is incredibly important, so it is worth putting in effort to get it right. Photos of your paintings will often be the first exposure people have to your art.
- If you are selling art, you might want to consider just hiring a professional to take photos of your paintings in bulk.
- The purpose of the photo will help determine what quality of photo you need. If you are just taking photos for social media, then your phone camera will be fine. But if you want to use the photo for prints, then you will need a high-quality photo.
How Do You Photograph Your Art?
This is just my way of doing things and I am sure there are many improvements I could make. I am not a photographer after all.
What is your process for taking photos of your art? Feel free to share in the comments.
Want to Learn More?
You might be interested in my Painting Academy course. I’ll walk you through the time-tested fundamentals of painting. It’s perfect for absolute beginner to intermediate painters.
Thanks for Reading!
I appreciate you taking the time to read this post and I hope you found it helpful. Feel free to share it with friends.
Information taken from Dan Scott article Draw Paint Academy
Happy painting!
Artist Nata Shemshur
https://www.natashemshur.com
https://linktr.ee/ArtNataShemshur

Leave a comment