When showing and selling your work online, one of the most important things you need to do is to ensure that the images of your work are high quality.
This not only gives your profile a clean and professional look, but it also makes the photos look true to the work.
In addition, it gives potential clients the ability to observe your work in great detail without questioning the quality of the work itself; which means a higher chance of a sale for you!
So what does it mean when we talk about the quality of an image, especially a digital image when we post online?
We recommend for the primary photo of a work to be at least 1500 by 1500 pixels in dimensions and additional photos to be at least 750 by750 pixels.
What is a pixel?
A pixel is a single unit of light and colors on a screen that helps make up the digital image as a whole. When there are fewer pixels, the photo will be blurry and have less detail; with more pixels, it is a much clearer image with details.
Where can you find the pixel dimensions of a photo on your computer?
It’s pretty easy and almost the same for Mac/iOS and PC/Windows users.
For Mac/iOs:
- Right-click on the image and select “Get Info.”
- A Pop Up Window will appear, and you will want to select the drop-down arrow next to “More Info.”
- The drop-down will display “Dimensions,” and you will see the pixel numbers of that image. From there you will see the pixel number of the image.
For PC/Windows:
- Right-click on the image and select “Properties.”
- The properties window will appear, and you will select the “Details” tab found on the top of the window.
- Within the details tab, you will see under “Image” the photo’s pixel dimensions.
Adjusting your pixel dimensions how to:
There are so many ways to change the pixel size dimension of your images, and thankfully you don’t have to be a computer genius to do this, as there are free and easy ways!
For Resizing images on a Mac:
- Double click on the image and it will open to Preview
- Select the “MarkUp” icon in the top menu bar of the Preview window
- Then select “Adjust Size.”
- A new pop-up window will appear, and you can enter the new numbers you want to have for the image. Then click OK.
For Resizing Images on Windows/PC:
- Double-click or right-click on an image and select Open In Photos (this is a default application on Windows)
- At the top of the Photos window showing your image, you will see an icon on the top menu bar that is three dots in a row.
- Select the three-dot icon, and click “Resize Image.”
- A new window will appear, and you will select “Define Custom Dimensions.”
- The “Resize image” window will pop up, and you can enter the dimensions you want. Always be sure to keep the “Maintain aspect ratio” box checked.
- Then click save!
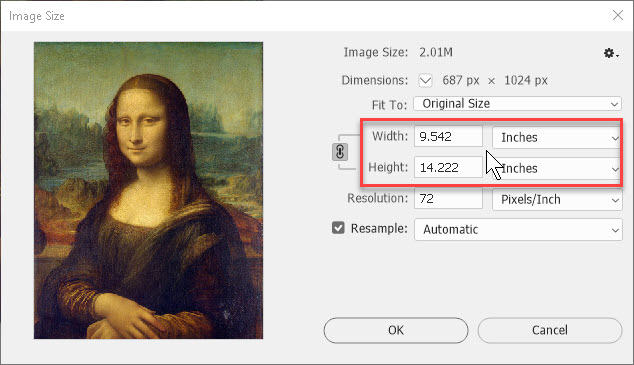
Of course, if you have Photoshop on your computer, you can also use it to resize your images as well:
- Open an image in Photoshop and select at the top menu bar “Image.”
- Then select “Image Size.”
- A new window will appear. Make sure to select the arrow next to Dimensions to see that it is measured in pixels or px.
- From there, you can adjust your width and height accordingly.
- Then click Ok! (and of course, don’t forget to save the file after)
Until next time, Artist Nata Shemshur
https://www.natashemshur.com
https://linktr.ee/ArtNataShemshur

Leave a comment